How to Take Product Photos With Your Phone That Actually Sell
No studio, no DSLR, no foam board from a craft store. Here's how to shoot product photos that compete, using your phone and what you already have.
Published: July 17, 2026 · 9 min read
By Dokun Bamigboye · Founder, Growpins AI, based on seller account audits across Jumia Nigeria, Ghana, and Kenya, where product image quality is one of the most common reasons listings underperform
Quick Navigation
You listed a product on Jumia or your own store. The photo is decent, you took it yourself, it shows the item, and it's in focus. And it's competing against a Chinese wholesale supplier who shot that same product in a professional studio with a $3,000 mirrorless camera and a full lighting rig.
Most phone photography guides don't acknowledge this. They tell you to find a large north-facing window, buy white foam board from a craft store, and shoot in "soft morning light." That advice was written for sellers in London or San Francisco. If you're shooting in Lagos, Accra, Nairobi, or anywhere the light comes hard and equatorial rather than soft and diffused, the approach needs to change.
This is the guide. Everything here is based on what actually works for sellers in African markets, with the equipment they have, in the light conditions they shoot in, competing on platforms where the benchmark image is a Guangzhou studio shot.
The Real Problem With Most Product Photos
Bad lighting is the most common issue. But it's not the only one.
The deeper problem is that most sellers treat photos as a documentation task rather than a sales task. They photograph the product to prove it exists. A buyer needs the photo to make a decision, to answer whether this is the right size, whether the quality looks real, whether the colour matches what they pictured, whether the thing is worth what you're charging.
Every photo should answer one of those questions. If you have five photos and they all show the same angle in slightly different lighting, you haven't helped the buyer at all. You've just proved the product exists from five slightly different perspectives.
The seller who outsells you usually doesn't have better products. They have photos that answer more questions.
What You Actually Need
Nothing expensive. Genuinely.
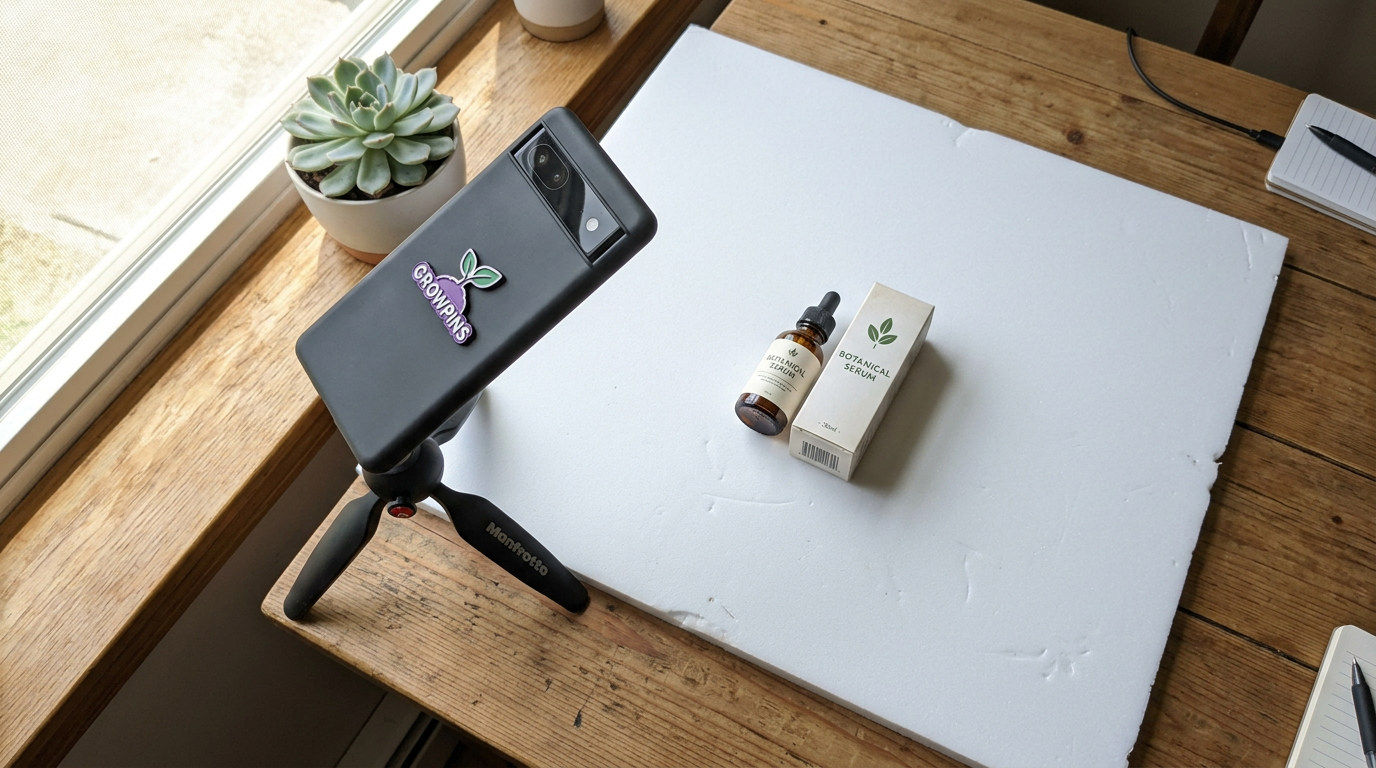
Your phone: any smartphone from the last three years is sufficient. The camera is not your limiting factor. Lighting and setup are.
White cardboard or foam board: available from any stationery shop, printing centre, or market. In Nigeria, a sheet of white carton from Computer Village or any stationery shop works fine. This is both your background and your reflector.
A window: not a large north-facing window. Just a window. We will deal with the light quality below.
A mini tripod or phone stand: under ₦3,000 to ₦5,000 from any electronics market. Without this, you will fight blur in every shot and lose.
A flat surface: desk, table, clean floor. That is it.
You do not need a lightbox, a ring light, a backdrop stand, or any dedicated photography equipment to produce listing images that are competitive on Jumia or your own store. Sellers spending money on equipment before fixing their lighting technique are getting the order wrong.
Lighting in African Conditions
Here is where almost every guide fails African sellers.
Standard photography advice assumes soft, diffused, northern European daylight, overcast skies, indirect sun, and gentle shadows. That is not what you are working with in Lagos at 11 am. Equatorial light is bright, direct, and harsh. Shadows are sharp and dark. Highlights blow out fast. Shooting in direct sun here does not give you beautiful natural light. It gives you half your product in deep shadow and the other half overexposed.
How to check your current photos
Look at a photo you have taken in daylight. Can you see both the lit side and the shadow side of the product clearly? Or does one half disappear into either white or black? If the contrast is extreme, you are shooting in direct or near-direct sun and it is killing your image quality.
The fix: shade, not darkness
The goal is not less light. It is more diffused light. Two approaches that work in practice:
Shoot in shade with a reflector. Position your product in a shaded area that still has good ambient brightness, under an overhang, on a covered balcony, or inside near a window but not in the direct path of sunlight. Place your white cardboard opposite the main light source. It bounces ambient light back onto the dark side of the product and fills the shadow. This is what a professional studio reflector does. Cardboard works the same way.
Use net curtains or a white bedsheet as a diffuser. If your window is the main light source and the sunlight is direct, hang a white bedsheet or light fabric across the window. It scatters the light before it hits your product. Sharp, harsh light becomes soft, even light. The product lights evenly. Shadows soften.
Best shooting times in most of Nigeria and West Africa: before 9am or after 4pm. The angle of the sun is lower and the light is softer. Mid-day shooting in direct sun is genuinely difficult to work with. If your schedule forces mid-day shoots, shade plus reflector is the only reliable fix.
Background Without a Studio
Your background does two things: it removes visual distraction, and it communicates something about your brand. Both matter.
White background (for marketplace main images)
If you sell on Jumia or plan to, your main image should be on a white background. Jumia's content guidelines specify this, and listings with clean white main images get more clicks in search results than listings with busy backgrounds.
To achieve this without a studio: lay a sheet of white carton on your desk and curve it up against the wall behind the product, creating a seamless background with no visible edge between the desk and wall. This is called a sweep. It costs nothing. It is what almost every product photographer uses, even with professional equipment.
Textured and lifestyle backgrounds (for social media and secondary images)
White works for the main image. Everything else can be more interesting. Fabric, wood boards, ankara print, a tray, a kitchen surface, a hand. These work well for Instagram and for the secondary images in your listing that show the product in context. A candle on a concrete surface. A skincare product on ankara fabric. Dried flowers beside handmade jewellery.
The rule is simple: the background should complement the product, not compete with it. A bright product on a neutral background. A neutral product can handle a more interesting background. When in doubt, test both and see which version you would click on as a buyer.
Angles and Composition
Three angles cover most products:
Straight-on at product height. Camera at the same level as the product, shooting directly at its face. Works for anything with a front: bags, bottles, shoes, packaging, electronics. Clean and factual.
45 degrees above. Camera angled down at roughly 45 degrees. Shows depth and dimension. The most forgiving angle for beginners, it works for almost every product type and is hard to do badly.
Flat lay. Camera directly above, shooting straight down. Works brilliantly for fashion, accessories, food, beauty, and anything with a visual pattern. Gives you complete control over what is in frame.
Enable the grid on your phone camera. Position your product at the intersection of the grid lines rather than dead centre. This is called the rule of thirds, and it makes a shot look deliberate rather than accidental. It takes about ten seconds to apply,y and the difference is visible.
One thing that catches most sellers: close-up detail shots. A close-up of stitching, a clasp, the texture of fabric, a label, the finish on a surface. These shots answer the question "Is it actually good quality?" before the buyer asks it. They build trust. Most sellers skip them. That is a mistake.
Camera Settings That Matter
Most of what your phone does automatically is fine. A few things are worth controlling manually:
Tap to focus: tap the screen on your product. Do not assume the camera is focused where you want it. Tap to confirm it.
Lock focus and exposure: on most phones, hold your finger on the focus point until a lock icon or AE/AF lock appears. This stops the camera from auto-adjusting while you shoot. Without this, the exposure shifts between shots and your edits have to compensate.
Rear camera only: always. Front cameras are significantly worse in terms of image quality. There is no exception to this.
Highest resolution setting: check your camera settings and confirm you are shooting at maximum resolution. Some phones default to a lower quality setting.
Flash off: the built-in flash produces flat, harsh light and an orange colour cast. Turn it off. If you need more light, use the window and reflector method above.
Digital zoom: never, as it visibly degrades image quality. Move the phone physically closer to the product instead.
Editing: Free Apps, 15 Minutes
Every professional product photo is edited. That does not mean heavy manipulation. It means the basic adjustments that let the photo show the product at its best rather than whatever the camera captured.
Two apps cover everything you need, both free:
Snapseed: brightness, contrast, saturation, sharpening, perspective correction. The healing tool removes dust spots. The selective tool lets you brighten or darken a specific area without affecting the whole image. This handles 90% of product photo editing.
Lightroom Mobile (free version): more precise colour control. Worth learning if you shoot regularly. Create a preset from your first edited photo and apply it to every subsequent photo in the session. This creates visual consistency across your catalogue without doing the same edits 40 times.
Five edits to apply to every photo
Brightness: lift if the photo looks dark. Lower if it is overexposed.
White balance: your white background should look white, not yellow or blue. Adjust the temperature slider until it does.
Contrast: a small increase adds depth and makes the product look more three-dimensional.
Sharpening: a small amount. Too much creates visible noise. Enough to make textures and edges look crisp.
Crop and straighten: horizontal and vertical lines should be straight. The product should fill the frame without feeling cramped.
If you need a clean white background and your shoot setup did not quite get there, remove it.bg removes the background and replaces it with white automatically. Free for standard resolution. It handles complex edges reasonably well. Not perfect, but good enough for most product listings.
The 6 Shots Every Listing Needs
Each shot should answer a different question. If two shots answer the same question, one of them is doing no work.
Main hero shot: clean background, best angle, product fills the frame. This is the image that appears in search results. It decides whether the buyer clicks. Everything else is secondary to getting this one right.
Second angle: the back, the side, or a three-quarter view. Answers: "What does the rest of it look like?"
Detail close-up: texture, stitching, label, material finish, a specific feature. Answers: "Is it actually good quality?"
Scale reference: product held in hand, or placed next to a familiar object like a phone or a coin. Answers: "How big is it actually?" This is one of the most common buyer questions and one of the most commonly skipped shots.
Lifestyle shot: product in use or in context. A skincare product on a bathroom shelf. A bag on someone's shoulder. Fabric styled. Answers: "Can I picture this in my life?"
Packaging shot: how the order arrives. If your packaging is good, this is a selling point. It also reduces "what did I receive?" messages from buyers who expected different packaging.
Five to six shots per product covering these categories outperform ten shots of the same product from slightly different angles. The quality of questions answered matters more than the quantity of images. For more on how your photos connect to your overall listing performance, read our guide on how Jumia's search algorithm weighs image quality alongside other ranking factors.
Frequently Asked Questions
What is the best phone camera for product photography?
Any flagship or mid-range phone from the last two to three years works fine - iPhone 13 or newer, Samsung Galaxy S21 or newer, Tecno Camon series, Infinix Zero series. The phone matters much less than you think. A mid-range phone in good diffused light will produce a better product photo than a flagship phone in harsh direct sun. Fix the lighting before upgrading the equipment.
Should I use portrait mode for product photos?
Test it on your specific products. Portrait mode creates background blur that looks good for some items, jewellery, small accessories, beauty products - but can be unpredictable around complex edges or small items with fine detail. It also makes the photo harder to crop or reframe in editing. For your main listing image, a sharp photo with a clean background generally works better than portrait mode blur.
How do I get a pure white background without a studio?
White cardboard curved into a sweep shape, with a window to the side and a second white card opposite to reflect light onto the product. That combination gets you very close to pure white without any dedicated equipment. Remove.bg handles the remaining imperfections for free. The sweep technique is what most small product photographers use regardless of location or budget.
How many product photos does a Jumia listing need?
A minimum of five. The main hero shot, a second angle, a close-up detail, a scale reference, and a lifestyle or context shot. Listings with more images consistently get higher click-through rates and conversion rates than listings with one or two images. Jumia's own seller guidelines recommend at least four images per listing, and their content scoring system rewards complete listings over partial ones.
Can I improve my product photos with AI tools?
Yes, for specific tasks. Background removal (remove.bg, Canva) is reliable and free. AI upscaling improves the resolution of photos that came out slightly soft. AI background replacement lets you put your product in a lifestyle setting without a location shoot, useful for social media content. These tools work best on good base photos. AI cannot fix a badly lit or out-of-focus shot. Get the photo right first, then use AI to extend what you can do with it. Our guide on product description SEO covers the text side of getting your listings to rank once your images are ready.
Related reading: How to rank your products on Jumia search · Product description SEO: the complete guide · How to write product titles that sell
Share this post
Have a question about this post? Contact the author